
Table of Contents
I still remember the first time I tried making air fryer chicken breast after a long, exhausting day. I was craving something warm and satisfying, but I didn’t want to spend forever in the kitchen. I threw together a few simple ingredients, crossed my fingers, and within minutes, the smell filling my kitchen felt like a hug I didn’t know I needed.
You know those meals that somehow just hit the spot? This became one of mine. It’s quick, easy, and tastes like something you’d expect from a cozy dinner, not a quick fix. And the best part? It doesn’t need anything fancy, just a few pantry staples, a good air fryer.
If you’ve ever stood in your kitchen wondering what to cook that won’t drain your energy, this air fryer chicken breast is your answer. It’s the kind of recipe that gives back. No stress, no mess, just juicy, flavor-packed chicken that feels like a small win at the end of a busy day.
Why You’ll Love This Recipe
It’s actually juicy: No more dry, tough chicken, this recipe gives you tender, moist chicken breast every single time.
Fast and fuss-free: Form start to finish in under 20. Perfect for weeknights when you’re short on time (and patience).
Big flavor with simple ingredients: A blend of spices, a pinch of brown sugar, and a touch of cornstarch work magic without needing anything fancy.
Crispy edges, golden outside: That air fryer crisp? Game-changer. You’ll get those satisfying little browned bits with no deep frying needed.
Great for meal prep: Make a batch, store it, and use it in salads, wraps, or bowls throughout the week.
Family-approved: Even picky eaters ask for seconds. It’s one of those rare wins that pleases everyone at the table.
Guilt-free comfort: Crispy and satisfying, without loads of oil or heavy breading.
Keeps you coming back: Honestly? I never thought I’d say this about chicken breast, but I crave this recipe. You just might, too.
Ingredients
- Boneless, skinless chicken breasts: I usually go with the regular packs from the grocery store, nothing fancy. For even cooking, go for slices that aren’t too chunky. If they’re large, I slice them in half lengthwise.
- Avocado oil or any mild-flavored oil: I prefer avocado oil because it has a high smoke point and doesn’t overpower the seasoning. But if all you’ve got is olive oil or even canola, go ahead and use that.
- Paprika and smoked paprika: The combo gives that warm, slightly smoky kick. The regular paprika adds a rich color while the smoked one brings depth without being too strong.
- Garlic powder and onion powder: These two are my go-to flavor boosters. They help build that savory base without needing fresh garlic or onions (which can burn in the air fryer).
- Fine salt: I usually stick with plain table salt here because it sticks better to the chicken. Kosher or sea salt works too, but I recommend crushing it finer for even coating.
- Brown sugar: Just a small touch adds a bit of contrast to the savory and smoky elements. It also helps with getting that golden crust on the outside.
- Cornstarch: This one’s a little trick I use when I want the outside to get a slight crisp. It’s not overpowering, just enough to give the chicken that irresistible texture when it hits the hot air.
Recommended Tool
Instant-Read Meat Thermometer:
If there’s one tool I recommend above all, it’s this. It helps you check that your chicken reaches the perfect internal temperature without cutting into it. No more guessing games or dry meat, just juicy, safe, and perfectly cooked chicken every time.
My Favorite Air Fryer:
I’ve tested a few, but the one I use now is reliable, easy to clean, and gives that crisp golden finish without needing a drop of oil. If you’re serious about air frying, invest in one that gives consistent results. You’ll thank yourself later.
Non-Slip Cutting Board:
A sturdy, non-slip cutting board might not seem like a big deal, but trust me, once you have one, you won’t go back. It makes slicing and prepping chicken feel safer and smoother, especially when dealing with juicy, cooked meat.
Instructions
1. Slice the chicken thin
First things first, grab those chicken breasts and slice them into thinner, flatter pieces. Not tiny chunks, just nice thin cuts that’ll cook evenly and quickly. I usually get 3 to 5 slices out of each breast depending on the size. If they look a bit wet, pat them dry with paper towels so they can crisp up better later.
2. Mix up the seasoning
In a bowl, I stir together all the spices until they’re well combined. Then I toss in the chicken slices and drizzle the oil over everything. I like to get hands-on here and mix it all up until each piece is fully coated. No need to marinate unless you have extra time. this mix is super flavorful right away.
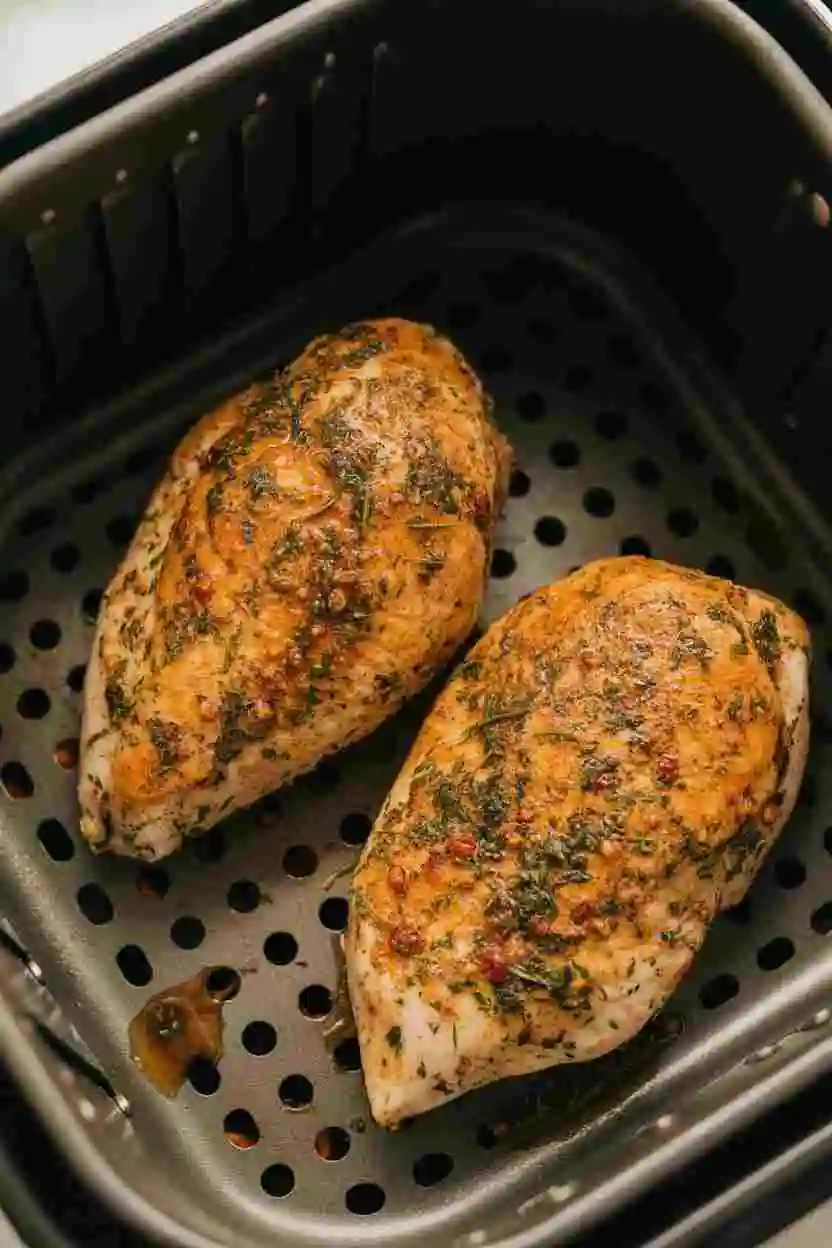
3. Preheat and arrange
Get your air fryer going so it’s nice and hot, I usually set mine to around 410°F. Lay the chicken in a single layer in the basket or on the tray. Don’t crowd it! A bit of space around each piece helps that crispy magic happen.
4. Cook until golden and juicy
Let it cook for about 8-10 minutes, give or take depending on how thick the slices are. Bigger pieces might need 10–15 minutes. You’re aiming for a golden exterior and an internal temp of 165°F. The smell at this point? Irresistible.
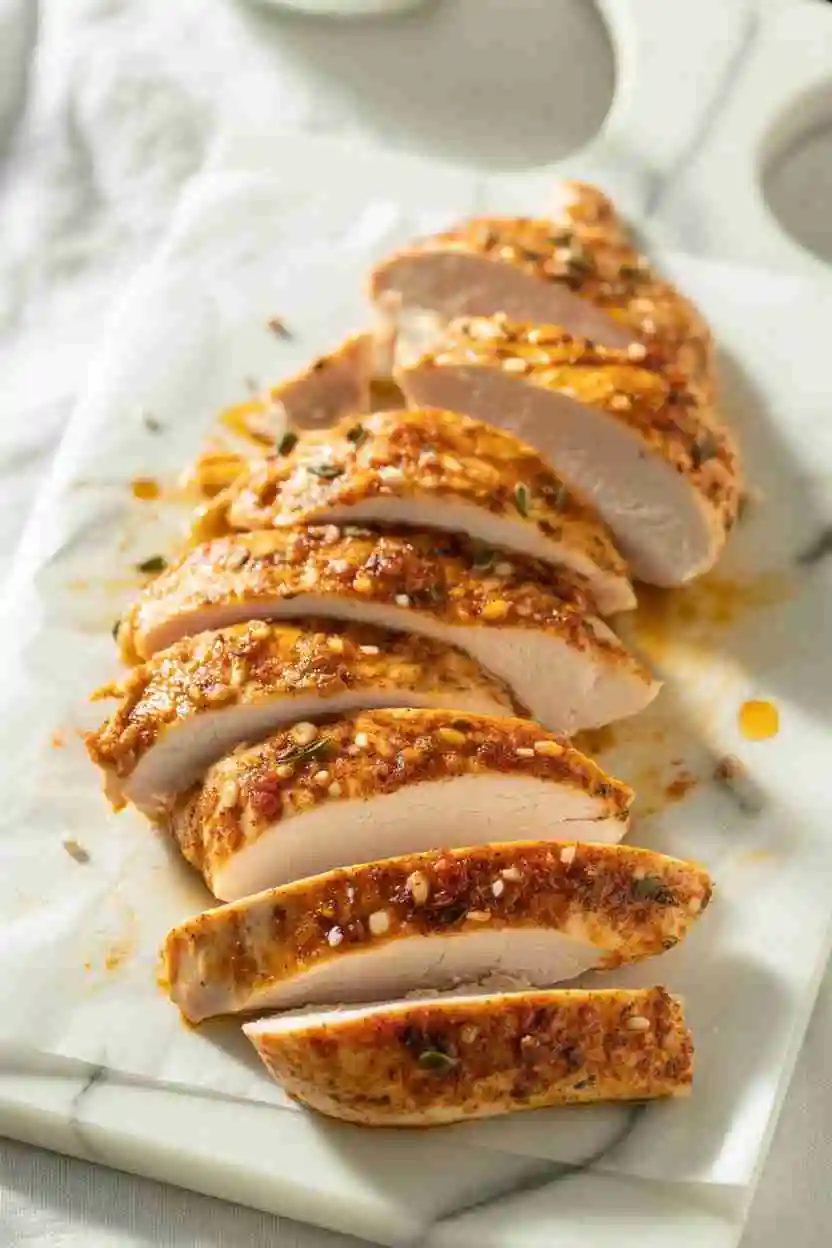
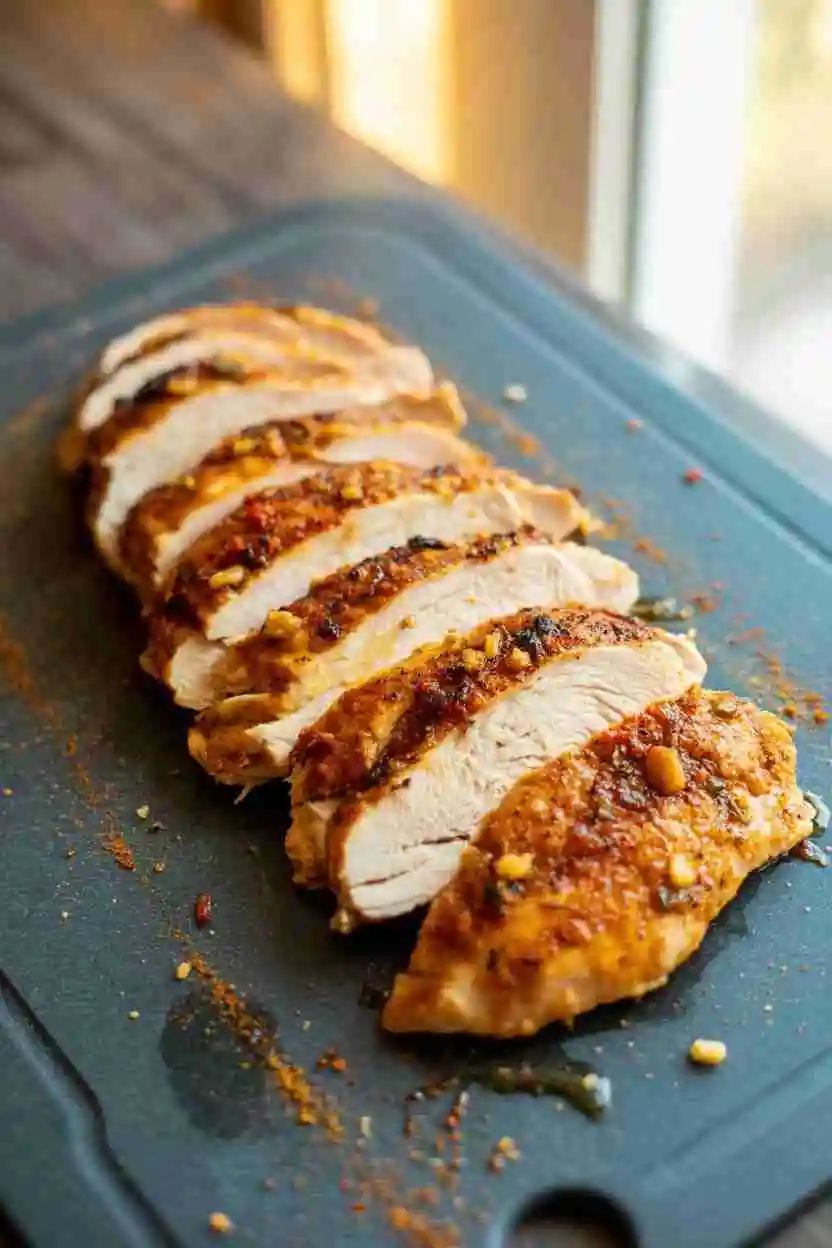
5. Rest, slice, and enjoy
Once it’s done, let the chicken sit for a minute so the juices settle in. Then slice it up and dig in, Honestly, I often end up eating half of it right at the counter. If you’ve got a favorite dipping sauce, now’s the time to pull it out. Mine? Something spicy and sweet does the trick.
Tips for Success
Flatten It Out for Even Cooking
If your chicken breasts are super thick on one side, don’t skip this step. What I usually do is press down on the thicker parts with the bottom of a sturdy pan, just enough to even things out so they cook evenly. No need to go too hard, just a gentle flattening does the trick.This helps the chicken cook evenly without the thinner parts drying out.
Using Frozen Chicken? No Problem
I’ve cooked chicken straight from frozen plenty of times when I forgot to thaw it (you’re not alone!). Just make sure the pieces aren’t stuck together, and pop them in the air fryer at 400°F for around 25-30 minutes. Flip them halfway through, and keep an eye on the internal temp.
Don’t Leave It Sitting in the Air Fryer
Once the timer dings, I always take the chicken out right away. Leaving it in the hot basket can cause it to keep cooking, and that’s when it gets dry. Removing it promptly locks in that juicy tenderness.
Variations
Play with Seasonings
You don’t always have to stick with classic herbs. Sometimes I swap in smoky Cajun spice for a little heat, or go full-on Mediterranean with a Greek blend. If you’re craving something different, experiment with your favorite spice mix, you’d be surprised how much flavor a simple switch can bring.
Marinade Magic
Want extra depth? Try marinating the chicken for a few hours (or overnight if you’ve got time). I personally love using simple vinaigrettes, lemon-garlic blends, or even store-bought Italian dressing for a quick boost. It adds moisture and flavor without extra effort.
Use Chicken Thighs Instead
If you’re more into dark meat, feel free to use boneless thighs. I do it all the time when I want something richer and a little more indulgent. Just remember the cooking time will vary a bit since thighs are naturally juicier and fattier.
Drizzle On Some Sauce
Once the chicken is cooked, this is your moment to shine. I often serve mine with a quick lemon-garlic butter drizzle or a creamy yogurt herb sauce. Some days I’ll go bold with a smoky BBQ dip or even a spicy Peri-Peri sauce, depends on my mood.
How to Store
Keep It Fresh (Fridge)
Once your chicken has cooled down, pop it into an airtight container and store it in the fridge. It’ll stay good for around 3 to 4 days. I often slice mine ahead of time so I can toss it into salads or wraps the next day, super convenient.
Bring It Back to Life (Reheating)
To warm things up without drying them out, I suggest using your air fryer or oven at 350°F. Just a few minutes is all it takes to get that juicy texture back. Skip the microwave if you can, it tends to zap the flavor.
Save It for Later (Freezing)
Planning ahead? Freeze your cooked chicken in a freezer-safe bag or container. I always label mine with the date, and it’s good for up to 2 to 3 months. When you’re ready to eat, just let it defrost overnight in the fridge, then reheat gently.
FAQs
How long do I air fry chicken breasts?
The size of your chicken breast plays a big role in how long it needs to cook. For smaller pieces, around 5 to 7 ounces, I usually set the timer between 8 and 12 minutes. Medium-sized breasts, closer to 8 to 10 ounces, take about 10 to 14 minutes to cook through perfectly. If your chicken breasts are on the larger side, 10 ounces or more, you’ll want to air fry them for roughly 10 to 15 minutes. Just remember to check for an internal temperature of 165°F (74°C) to ensure they’re fully cooked and juicy every time.
Should I put foil in my air fryer for chicken?
It’s totally okay to cook chicken with foil in the air fryer, but make sure you handle it the right way. First, make sure the foil never comes into direct contact with the heating element to avoid any fire risk. Also, weigh the foil down properly so it doesn’t fly around inside the basket during cooking. Lastly, I recommend avoiding using foil with acidic marinades or ingredients, since that can cause unwanted flavors or chemicals to transfer to your food. Follow these tips, and foil can be a helpful tool for easy cleanup and keeping your chicken juicy.
Can you cook raw in an air fryer?
Absolutely, you can cook raw meat in an air fryer, but there are some key things to keep in mind. It’s best to start with fully thawed meat to ensure it cooks evenly and reaches the right internal temperature. Season your meat well before cooking, and keep an eye on it as it cooks to get the best results. While some frozen foods like chicken tenders or fries can go straight into the air fryer, raw meats really benefit from proper defrosting first for juicy, delicious results.
Does chicken need to be flipped in Airfryer?
Yes, flipping your chicken halfway through cooking helps it cook evenly and develop a nice, golden crust on both sides. I usually start by placing the chicken seasoned side down in the air fryer basket, then season the top side. After cooking for about half the total time, I flip it over to finish cooking. This simple step ensures juicy, well-cooked chicken every time.
Should I put flour on my chicken before putting it in the air fryer?
You can use flour on chicken before air frying, but keep it light. A single, thin coating usually works well. If you go for a thicker breading, like double-dipping in flour, it might not cook through properly, leaving dry or powdery spots. Air fryers don’t use oil in the same way as deep fryers, so too much flour can end up undercooked. For the best results, go with a light dusting or use a breadcrumb or batter alternative that’s more air fryer-friendly.
Why is my chicken breast not browning in the air fryer?
If your chicken breast isn’t browning properly in the air fryer, surface moisture is likely the issue. When the outside of the chicken is damp, it tends to steam instead of crisp, which prevents that golden color you’re looking for. To fix this, simply pat the chicken dry with paper towels before seasoning and air frying. A drier surface allows for better browning and a more appealing texture.
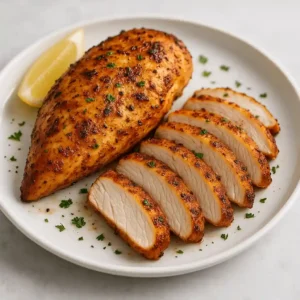
Air Fryer Chicken Breast
Ingredients
My Signature Spice Mix
- ½ tablespoon smoked paprika
- ½ teaspoon sweet paprika adds that warm color
- 1 teaspoon garlic granules
- ½ teaspoon onion powder
- 1 teaspoon light brown sugar this gives it that subtle caramelized edge
- ¾ teaspoon fine sea salt I personally like using fine salt, it sticks better to the meat
- ½ teaspoon cornstarch helps get that extra crispy crust in the air fryer
For the Chicken
- About 450g of trimmed chicken breasts usually two small pieces
- 1 tablespoon olive oil or avocado oil whichever you prefer, I switch it up
Instructions
- Prep your chicken like a pro: Start by slicing each chicken breast horizontally into thinner, flatter cuts. I usually get 3 or 5 slices out of a single breast. This step is key to that juicy inside and crispy outside.
- Dry it off: Gently blot the chicken dry with a paper towel to remove excess moisture. This tiny step helps the spices stick better and gives you that beautiful golden finish.
- Mix your magic blend: In a bowl, combine all the seasoning ingredients. Stir well so every grain is evenly mixed. Trust me, this spice blend brings big flavor with zero effort.
- Coat like you mean it: Place your chicken in a bowl or bag, drizzle with oil, and sprinkle in your seasoning mix. Use your hands (or tongs if you prefer) to coat each piece completely. You want flavor on every inch.
- Let it rest (optional but great): If you’ve got an extra 10–15 minutes, let your seasoned chicken sit while your air fryer preheats. This helps the flavor soak in, but no worries if you’re short on time. I’ve tossed mine straight into the fryer and still loved every bite.
- Air fry to golden perfection: Set your air fryer to 400°F (or 205°C) and preheat if your model allows it. Place the chicken pieces in a single layer with space around each one. Cook for about 10–12 minutes, flipping halfway. You’re aiming for an internal temp of 165°F (75°C). Larger slices might need a couple more minutes.
- Rest, slice, devour: Set your air fryer to 400°F (or 205°C) and preheat if your model allows it. Place the chicken pieces in a single layer with space around each one. Cook for about 10–12 minutes, flipping halfway. You’re aiming for an internal temp of 165°F (75°C). Larger slices might need a couple more minutes.
Notes
Nutrition
- Calories: 240 kcal
- Fat: 5g
- Saturated Fat: 1.5g
- Carbohydrates: 2g
- Fiber: 0.5g
- Sugar: 1g
- Protein: 35g
- Cholesterol: 90mg
- Sodium: 550mg