Table of Contents
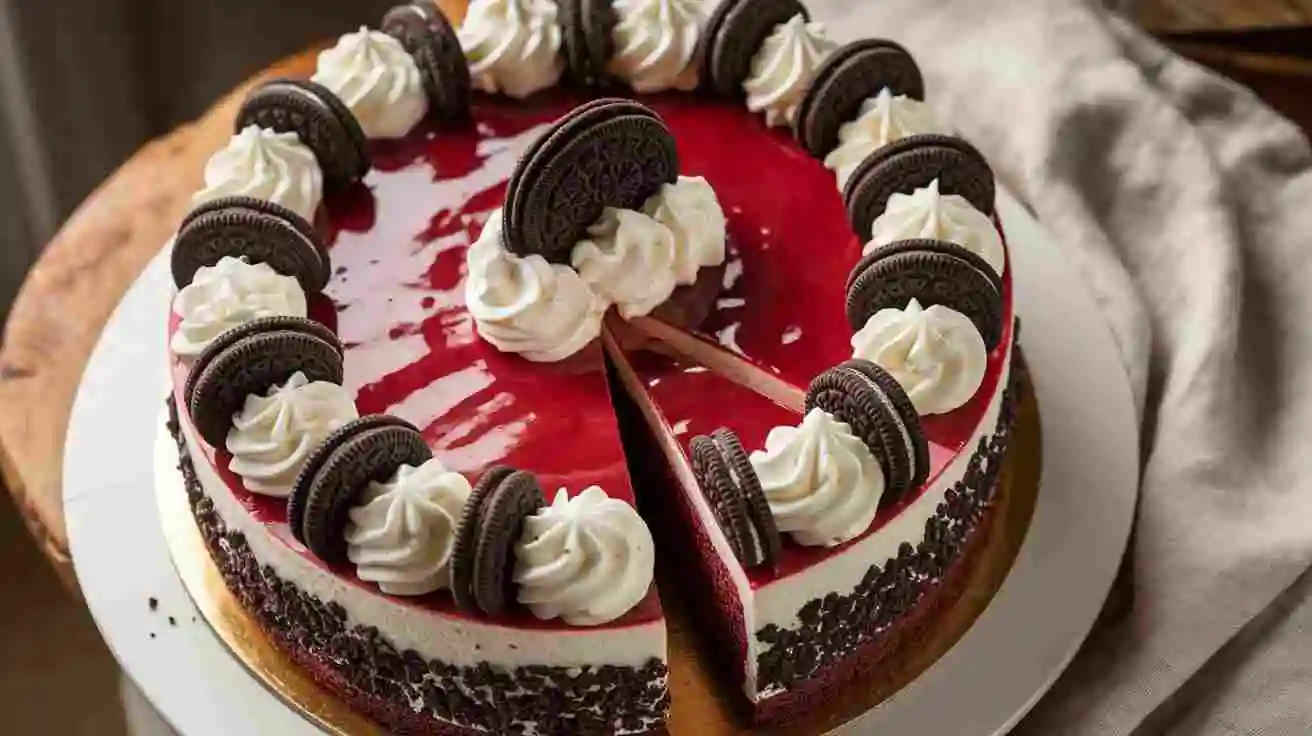
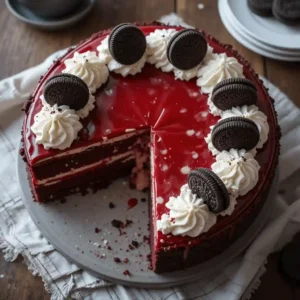
There’s something truly special about the combination of red velvet and cheesecake, isn’t there? It’s the kind of dessert that wraps you in comfort with every bite, deeply rich, incredibly smooth, and pure happiness on a plate. I remember the first time I made this Red Velvet Oreo Cheesecake; the way the creamy, velvety texture melted in my mouth was unforgettable. It was one of those moments where everything felt perfect, like a cozy celebration just for me.
This cheesecake is more than just a recipe; it’s a reminder to slow down and treat yourself to something sweet and special. Whether you’re marking a special occasion or just treating yourself, my Red Velvet Oreo Cheesecake is here to turn any day into something extra sweet and memorable.
Why You’ll Love This Recipe
Perfect balance of flavors: You get the smooth, velvety cheesecake filling, a hint of that classic red velvet tang, and the irresistible crunch of an Oreo crust in every single bite.
Eye-catching and elegant: The bold red color makes this cheesecake a real showstopper, perfect for birthdays, holidays, or whenever you want to wow your guests.
Surprisingly simple: It looks fancy, but trust me, this Red Velvet Oreo Cheesecake Recipe is easy enough for anyone to make. No stress, just pure deliciousness.
Ingredients You’ll Need
- Crushed Oreo Cookies: Keep the creamy filling in! Crush the whole cookies into fine crumbs for a rich, chocolatey crust that’s both crunchy and satisfying.
- Melted Butter: Acts as the glue for your crust while adding a melt-in-your-mouth buttery flavor.
- Block Cream Cheese: Full-fat cream cheese is a must for that irresistibly smooth and luxurious cheesecake filling. Stick with the real, full-fat kind, lighter versions just don’t give the same results.
- Granulated sugar: brings the right amount of sweetness to the cheesecake, smoothing out the slight sharpness of the cream cheese and letting the cocoa flavor shine.
- Full-Fat Sour Cream: Just a little makes your filling extra silky and adds a slight tang, boosting the signature red velvet flavor.
- Large Eggs (Room Temperature): Essential for structure and creaminess. Cold eggs can cause lumps, so bring them to room temp before mixing.
- Cocoa Powder: Adds a gentle hint of chocolate that pairs perfectly with the red velvet vibe without overpowering it.
- Liquid Red Food Coloring: Creates that iconic deep red color that makes every slice stunning. Pick a good brand if you really want those rich, vibrant results to pop.
- Pure Vanilla Extract: Enhances the overall flavor with warm, rich notes that tie everything together beautifully.
Equipment Required
Springform Pan: Essential for cheesecake, Thanks to the detachable sides, you can take the cake out smoothly without messing up those perfect layers.
Mixing Bowls: Handy for preparing the red velvet base and cheesecake filling separately.
Electric Mixer or Stand Mixer: Makes mixing the batter smooth and effortless, important for achieving a creamy texture without overbeating.
Large Roasting Pan or Deep Baking Dish: You’ll need this to create a water bath during baking, which keeps the cheesecake moist and crack-free.
Aluminum Foil: Use aluminum foil to securely wrap around your springform pan, keeping any water from sneaking in during the water bath.
Measuring Cups and Spoons: Precise measurements make all the difference for the perfect cake texture and flavor.
Tips for the Perfect Recipe
Once you press the Oreo crust into the pan, pop it in the fridge for about 10 minutes to help it firm up before pouring in the cheesecake filling.This step helps solidify the crust and keeps it from getting soft or mushy.
Let your cream cheese, eggs, and milk sit out until they’re no longer cold. Mixing everything at room temperature helps you get that silky, lump-free cheesecake batter we all love.
Mix gently: When folding in the red velvet batter and crushed Oreos, be careful not to overmix. Mix just until everything comes together, whipping too much air into the batter can cause cracks to form while baking.
Monitor the baking time: Every oven is different, so start checking your cheesecake toward the end of the recommended baking time. The cheesecake is done when the edges are firm, but the center has a slight wobble when gently shaken. Allow it to cool completely before transferring it to the fridge to set properly.
Finish with a flourish: Just before serving, add a dollop of fresh whipped cream and a sprinkle of extra Oreo crumbs for a beautiful and indulgent finishing touch.
How to Store Your Cheesecake
Refrigerate immediately: After serving, store any leftovers in an airtight container in the fridge. This ensures that the cheesecake stays smooth and flavorful throughout.
Use a cake dome: If you have one, a cake dome is perfect for keeping the cheesecake fresh without squishing the top.
How long it lasts: You can store your cheesecake in the fridge for up to 5 days. Just make sure it’s well-covered so it doesn’t pick up any unwanted odors from other foods.
FAQs
What does red velvet cheesecake taste like?
Red velvet cheesecake has a delightful blend of rich cream cheese and subtle cocoa flavors. The slight tanginess of the cream cheese perfectly balances the sweet, velvety texture, while the hint of cocoa gives it a soft chocolate undertone. The addition of red food coloring adds a visual appeal, making each bite both creamy and indulgent.
Does red velvet cheesecake need refrigeration?
Yes, red velvet cheesecake must be refrigerated to maintain its texture and freshness. Always refrigerate it for at least 4 hours (or overnight) before serving, so it sets properly and reaches its creamy, decadent consistency.
Are Red Velvet Oreos seasonal?
Yes, Red Velvet Oreos are often released around the holiday season. You might find them available in stores during winter months, especially around Valentine’s Day.
What’s in red velvet cookies?
Red velvet cookies typically include cocoa powder, buttermilk, butter, sugar, and a splash of vanilla. The red food coloring gives them their signature look, while the combination of ingredients creates a soft, chewy texture.
What is Red Velvet Oreo?
Red Velvet Oreos are a limited-edition version of the classic Oreo cookie. They feature two red velvet-flavored cookies with a cream cheese-flavored filling, giving them a distinct, sweet, and tangy flavor.
Are Red Velvet Oreos vegan?
Unfortunately, Red Velvet Oreos are not vegan as they contain ingredients like cream filling that are dairy-based. However, regular Oreos are dairy-free, making them suitable for vegans.
When did Oreo cake release?
Oreo cake was released in various forms over the years, with different Oreo-themed cakes appearing in stores. The iconic Oreo cookie cake was popularized in the early 2000s, becoming a hit for its creamy filling and crunchy cookies.
How to know when cheesecake is done?
Your cheesecake is ready when the edges are firm, but the center still has a gentle wobble. It will firm up as it cools. For the best result, check the internal temperature, it should reach about 150°F (65°C).
Why is it called red velvet cake?
The term ‘red velvet’ refers to the cake’s deep red hue and its soft, smooth texture that melts in your mouth. Originally, cakes made with cocoa were often referred to as “velvet” cakes due to their soft, luxurious crumb. The combination of cocoa powder, buttermilk, and a small amount of vinegar not only contributes to the cake’s texture but also enhances its distinctive flavor and appearance. The striking red color, which became more prominent with the use of food coloring, further solidified the name and made it a visually stunning dessert for special occasions.
Red Velvet Oreo Cheesecake Recipe
Ingredients
- 3 8-ounce blocks of full-fat cream cheese, softened to room temperature (avoid using fat-free or whipped varieties)
- 3 large eggs brought to room temperature
- 3/4 cup white granulated sugar
- 3 tablespoons full-fat sour cream at room temperature
- 1.5 tablespoons unsweetened cocoa powder
- 1.5 cups crushed chocolate sandwich cookies like Oreos
- 3 tablespoons melted unsalted butter
- 3 teaspoons liquid red food coloring
- 1.5 teaspoons pure vanilla extract
- Freshly made Cream Cheese Whipped Cream or homemade Small Batch Whipped Cream for topping
Instructions
- Preheat the Oven: Preheat your oven to 325°F (163°C) and prepare your springform pan by wrapping the outside with foil. This prevents any leaks during baking. Grease the inside of the pan lightly for easy removal later.
- Prepare the Oreo Crust: Crush your Oreo cookies into fine crumbs.To crush the cookies, you can either pulse them in a food processor or put them in a ziplock bag and smash them with a rolling pin. Once crushed, mix them with melted butter until the mixture sticks together when pressed.
- Shape the Crust in the Pan: Transfer the cookie-butter mixture into your springform pan and press it evenly into the bottom. Make sure the crust is compact and even throughout. Pop the crust into the oven for about 10 minutes to help it firm up.
- Let the Crust Cool: Once the crust has baked, take it out of the oven and let it cool completely. This ensures the crust stays firm when you add the cheesecake filling.
- Beat the Cream Cheese: In a large mixing bowl, beat the cream cheese on medium-high speed until smooth and creamy. This will take about 2-3 minutes. Use a spatula to gently scrape the sides of the bowl, ensuring all the cream cheese is fully mixed in.
- Add the Sugar and Sour Cream: Stir in the sugar and sour cream into the cream cheese blend. Continue to beat until it’s light and fluffy, scraping the sides of the bowl as needed.
- Incorporate the Eggs: Add the eggs one at a time, making sure to mix well after each one to fully incorporate them into the mixture. Make sure the mixture remains smooth and creamy throughout the process. Be careful not to overbeat.
- Add the Cocoa Powder and Food Coloring: After the eggs are well blended, sift in the unsweetened cocoa powder and pour in the red food coloring. Stir everything together until the mixture is smooth and the color is fully blended.
- Stir in the Vanilla Extract: Add the vanilla extract to the batter and mix until fully incorporated. This will enhance the flavor and give the cheesecake a lovely aromatic base.
- Add the Cheesecake Batter to the Crust: Carefully pour the cheesecake batter over the chilled Oreo crust. Use a spatula to spread it out evenly and smooth the surface for a polished finish.
- Set Up the Water Bath: Place your springform pan into a larger pan (like an 8×8 or bigger). Gently add hot water to the larger pan, filling it until the water reaches about halfway up the sides of the springform pan. The water bath ensures the cheesecake bakes evenly and helps avoid cracks on the surface.
- Bake the Cheesecake: Place the pan in the oven and bake for 65-75 minutes. The cheesecake is ready when the outer edges are firm, but the center still has a gentle jiggle. A toothpick inserted into the center should come out clean, but a slight jiggle is perfectly fine.
- Cool and Chill: Once the cheesecake is finished baking, gently run a knife around the edges to help loosen it from the pan. Allow the cheesecake to rest in the water bath for roughly 15 minutes to cool down gradually. Afterward, take it out and let it sit at room temperature for about an hour. Once cooled, cover it up and refrigerate for a minimum of 4 hours, but overnight is ideal, to allow the flavors to fully develop and the cheesecake to firm up.
Notes
- Calories: 480
- Total Fat: 32g
- Sodium: 430mg
- Total Carbohydrates: 47g
- Protein: 8g